Do you just bought a new laptop or notebook? and unfortunately there are no dvd room. While that moment you want to install the OS, and of course make you confused. The solution is the "Install Windows from USB", and how this could apply to Windows XP, 7, 8, 8.1 and 10 either the 32 or 64.
Here I will present some alternatives Install Windows From USB Flash Drives
What You need to prepare are:
1. at least 4 GB USB stick
2. Image Installation OS or disk
3. PC or Laptop with DVD Room (if you want to Install Windows From USB using the DVD / CD.
First, Download Windows USB/DVD Download Tool (for any version of Windows)
First, you’ll need to download and install the tool from Microsoft’s website, and then you’ll need to make sure that you have an ISO image of Windows 7, 8, or 10. This also works with Vista or XP, of course, but most people wouldn’t be installing those these days.
If you have issues using the tool, you might want to reformat your drive as NTFS beforehand, which you can do by right-cicking the drive icon in Windows Explorer.
Creating a USB Drive with the Windows Installer
It’s a pretty straight forward process, first browse to the location of your Windows ISO file and click Next.

Select USB device…this also helps you burn the ISO to DVD as well if you need that option.

Choose your flash drive and click Begin copying.

Now just wait for the process to complete. The drive will be formatted and files copied to the flash drive.

When the process is finished you will be able to see the files on the flash drive as you would if you opened the installation disc. Now you can start the installation on any computer that allows you to boot from a USB drive.

WinToFlash
Update: this utility distributes adware so we’re not linking to it anymore.
If you want to transfer a Windows 7 installation disc to USB…another super easy utility to use is WinToFlash. Just follow through the straight forward wizard, and you’ll be ready to install Windows 7 from your flash drive in no time.

The neat thing about this utility is it also offers different advanced features and tasks for other versions of Windows too.

It’s as easy as choosing the location of the Windows installation disc and the USB drive. Where in this example the DVD is drive (E:) and the flash drive is (F:). They recommend to turn off your Antivirus to increase the process speed, but we had MSE running on our machine and it didn’t seem to affect performance at all.

Next, you’ll need to agree to the Windows 7 EULA and hit continue.

Now just wait until the drive is formatted and the files are transferred over to the USB drive. The amount of time it takes will vary between systems. In our test it took around 10 minutes to complete over to an 8GB flash drive.

That’s it! Now the drive is ready so you can install Windows 7 on your netbook or any other computer that supports booting from a USB drive.

Using Rufus to Create bootable USB Flash Drives
Create bootable USB Flash Drives the easy way
Rufus is a utility that helps format and create bootable USB flash drives, such as USB keys/pendrives, memory sticks, etc.
It can be especially useful for cases where:
you need to create USB installation media from bootable ISOs (Windows, Linux, UEFI, etc.)
you need to work on a system that doesn't have an OS installed
you need to flash a BIOS or other firmware from DOS
you want to run a low-level utility
3. Using CMD to create bootable USB Flash Drives
1. Plug your USB Flash Drives
2. Go to RUN from the start menu (or right-click the bottom right corner on Windows8) type in the CMD.
3. After logging into the command prompt type DISKPART.
4. Type LIST DISK.
5. will appear a list of some of the disk there, note which USB Flash Drives.
6. Type SELECT DISK 1 (numbers adjusted with the usb disk from the list shown previously).
7. Type CLEAN.
8. Type CREATE PARTITION PRIMARY.
9. Type SELECT PARTITION 1.
10. Type ACTIVE.
11. Type FORMAT FS = NTFS.
12. Type ASSIGN.
13. Type EXIT.
14. Open Windows Explorer and enter INSTALLER CD to CD / DVD-ROM.
15. Open the CD Drive contained WINDOWS INSTALLER.
16. Copy the entire contents of the CD Installer, and then paste it in USB Flash Drives which has been fully processed.
Now you have Bootable USB Flash Drives
4. Using Adata OStoGO to Create Bootable USB Flash Drives
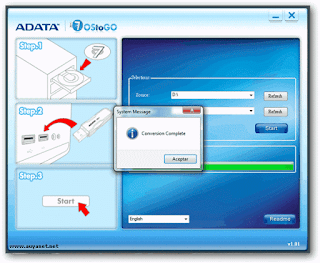
OStoGO assists you to convert Microsoft Windows Vista/7/8 Setup DVD to your USB Storage Device (e.g. USB Flash Drive, External USB Hard Drive, or SSD with USB port). Then you can install Microsoft O.S. via USB Booting instead of DVD Booting. OStoGO is an alternative solution to install OS for PCs and laptops without optical drives.
Final release in: Nov. 2009.
You can download OStoGO here
* note: if you do not have a cd / dvd room and just have the OS image, then you will need a virtual CD / DVD Room. You can use Alcohol 120%, Power ISO or Daemon Tools.
source:
*various sources
*https://rufus.akeo.ie/
*http://www.howtogeek.com/howto/9585/how-to-setup-a-usb-flash-drive-to-install-windows-7/ You have read Easy Ways to Create Bootable USB Flash Drives


